IRS Multi-Store System
Date : 18.04.2018
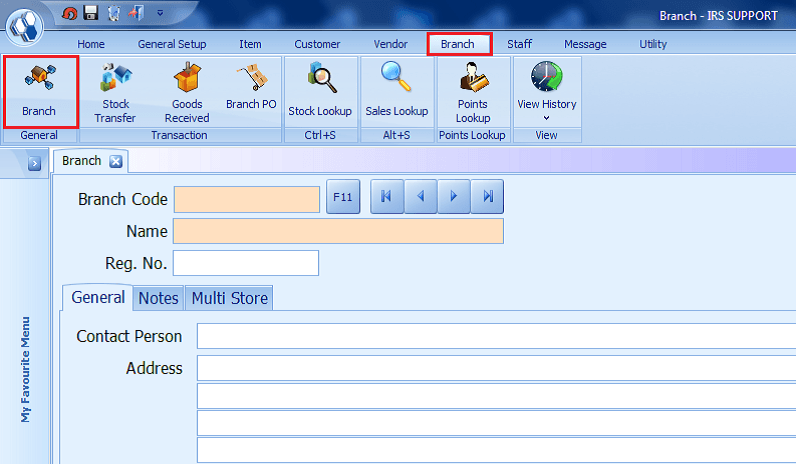
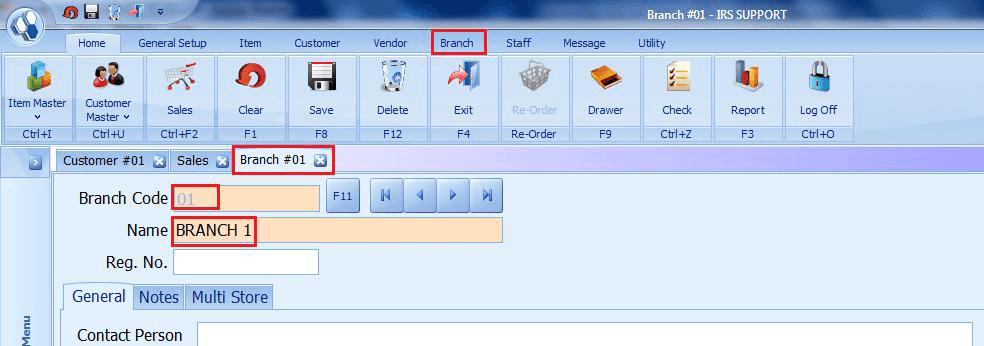
How to Create Branch
- 1. Go to Branch > Branch
- 2. Enter the Branch Code, Name and the details.
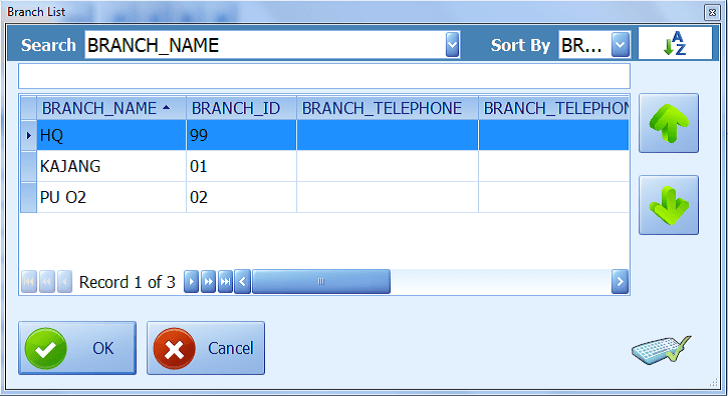
- 3. Below is the screen showing the Branch List
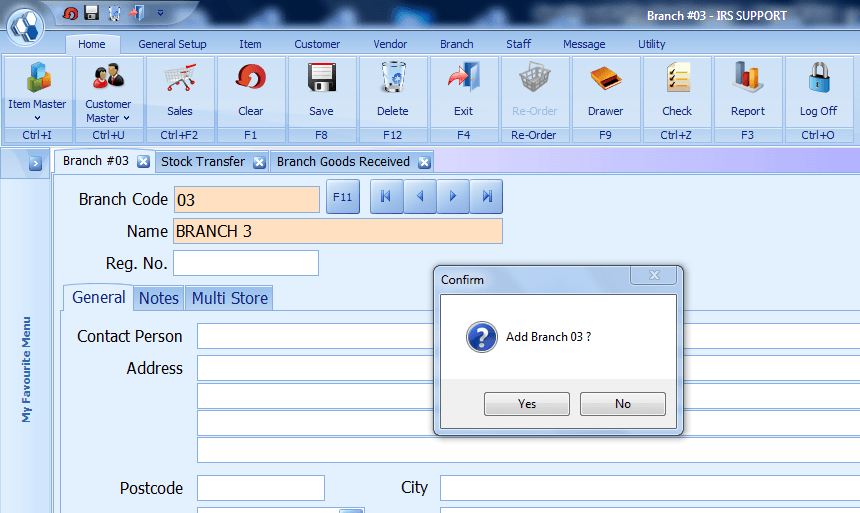
- 4. Confirmation screen to Add Branch
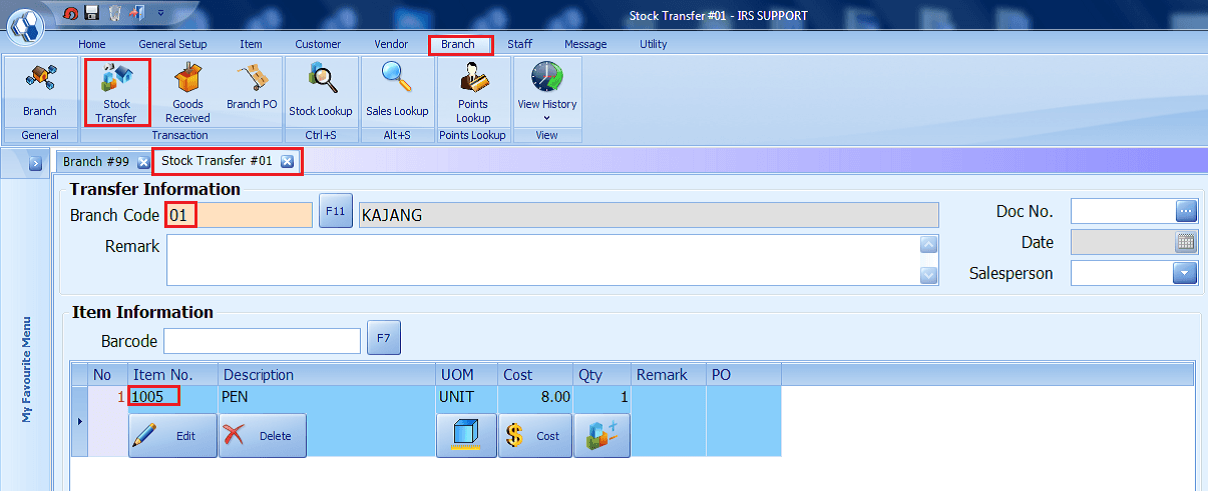
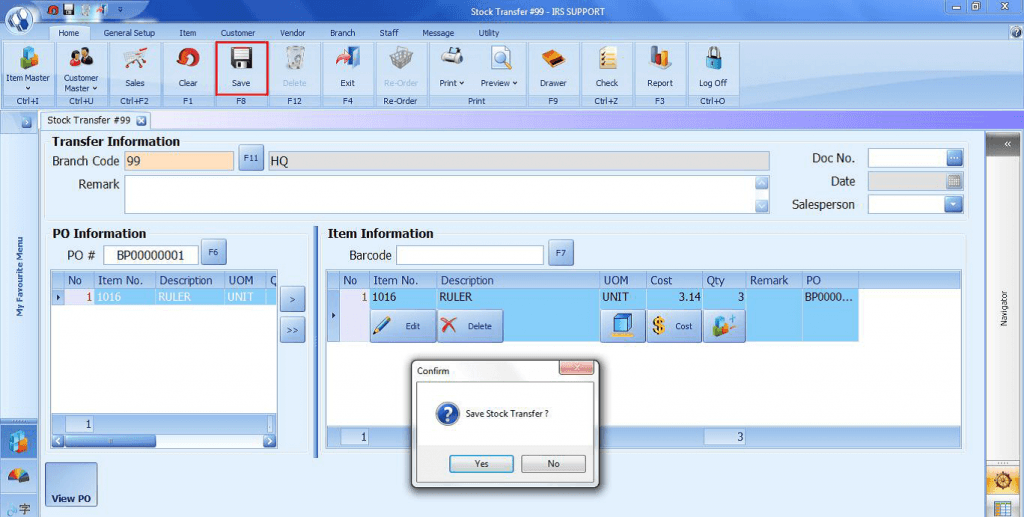
Branch – Stock Transfer
- Stock Transfer from HQ to Branch.
- Stock Transfer from Branch to HQ.
- Stock Transfer from Branch to Branch.
- 1. Go to Branch > Stock Transfer

- 2. Enter the Branch Code or press F11 to select the Branch to transfer the stock.
- 3. Select the item code by scan or press F7 to select the item to transfer.
- 4. The below screen shows the Item List.
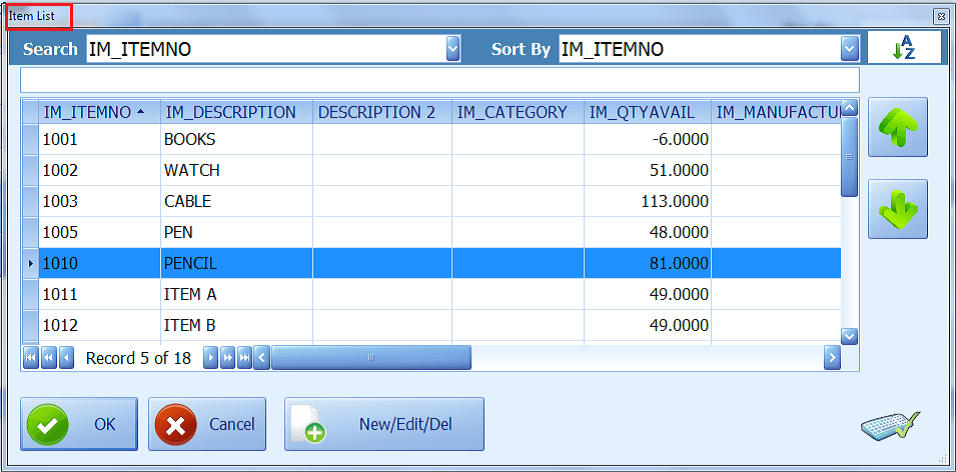
- 5. The user is allowed to edit the stock/item E.g: Stock Quantity.
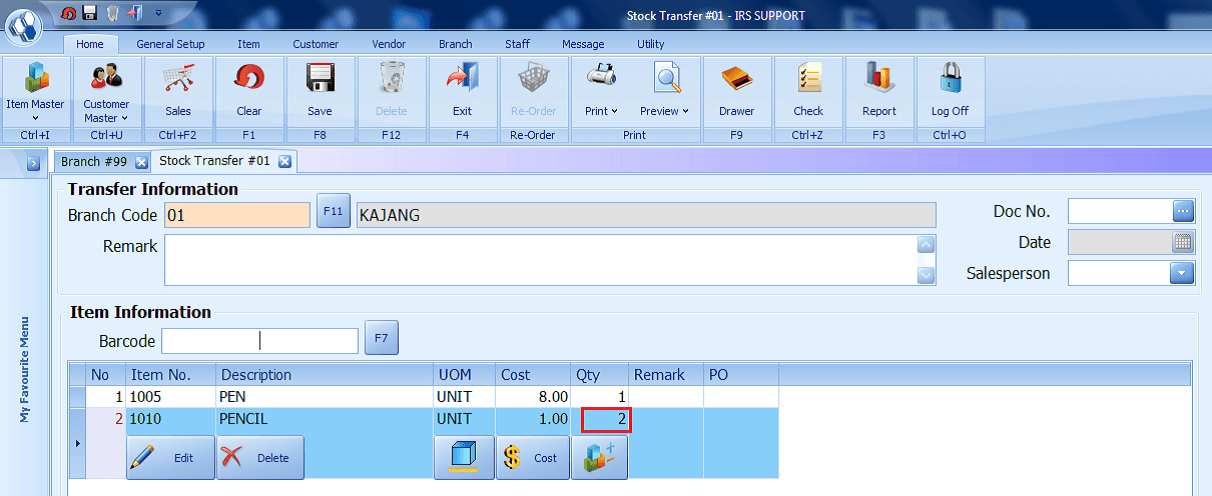
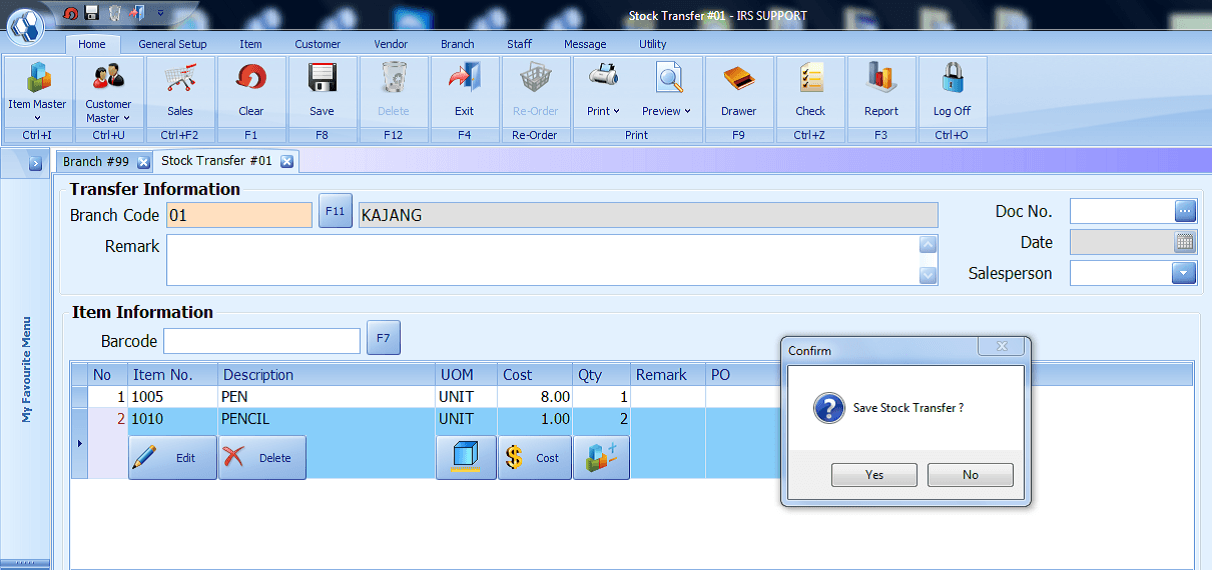
- 6. Click Save or press F8 to save the Stock Transfer.

- 7. Click “Yes” to confirm the Stock Transfer.
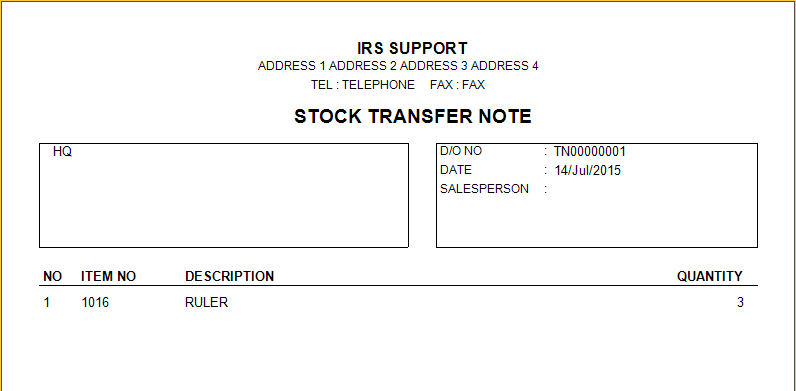
- 8. Stock Transfer Note Prompt
Note: 1. Double check on the item and quantity to be transferred as a stock transfer that has been confirmed and sent cannot be edited.
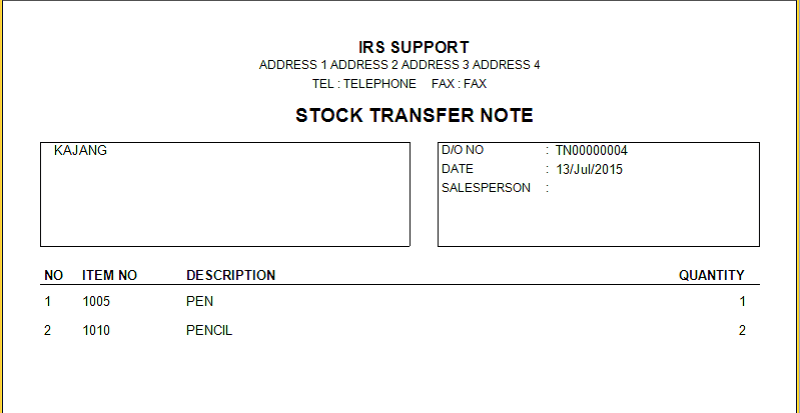
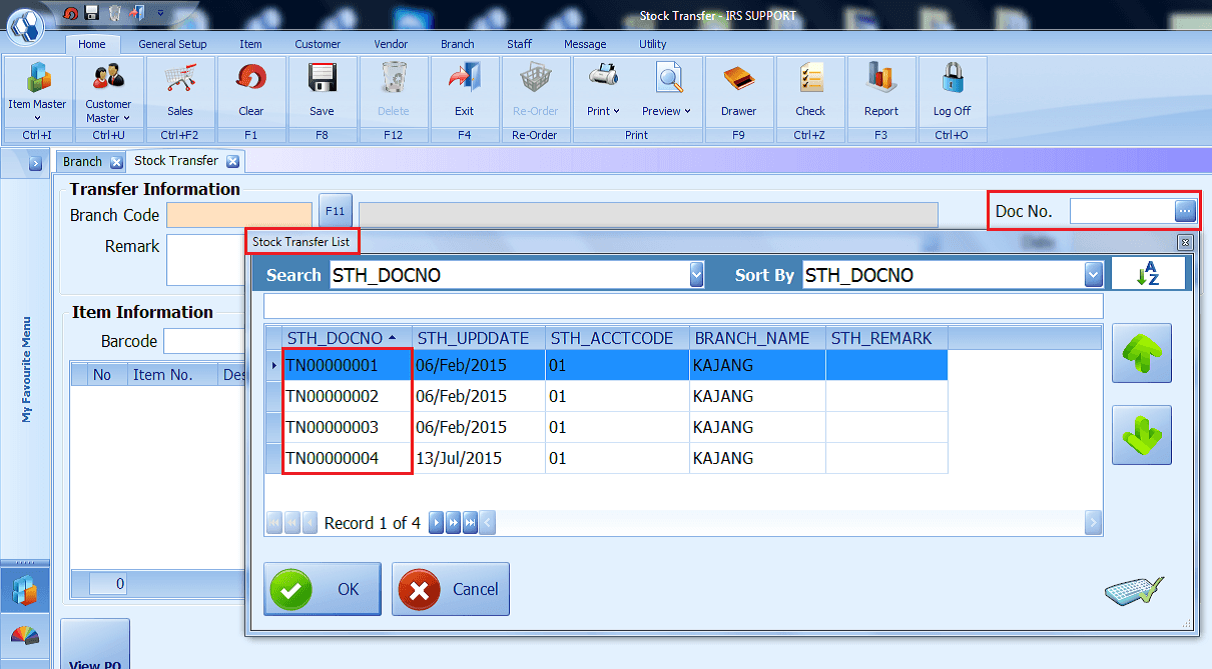
- 9. Go to Doc No. Drop-down list to view the Stock Transfer Note.
Branch – Goods Receive
- Branch receiving stock from HQ or other Branch (stock transfer from another branch).
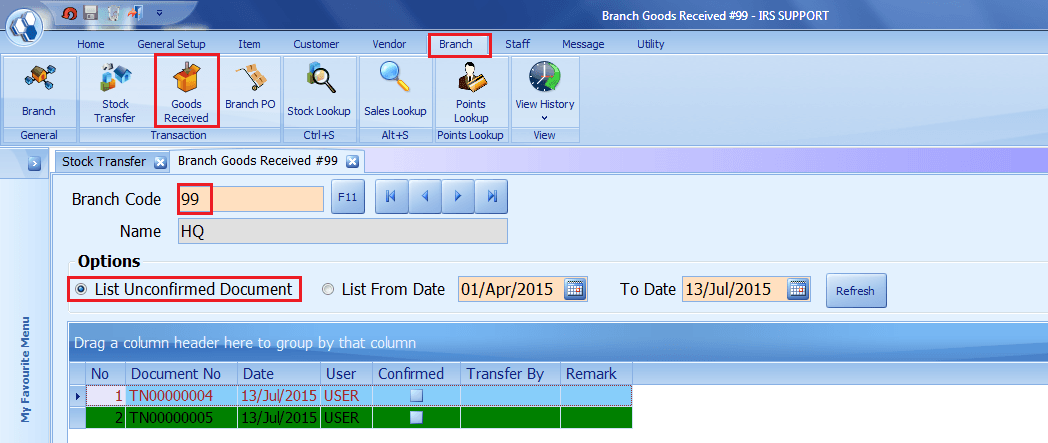
- 1. Go to Branch > Goods Receive
- 2. Enter the Branch Code or press F11 to select the branch.
- 3. The stock transfer note will be listed on the screen (if there is any).
- 4. There are 2 options for the user to choose:
- – List Unconfirmed Document – List the unconfirmed documents.
- – List From Date – To view confirmed documents based on the date range selected.
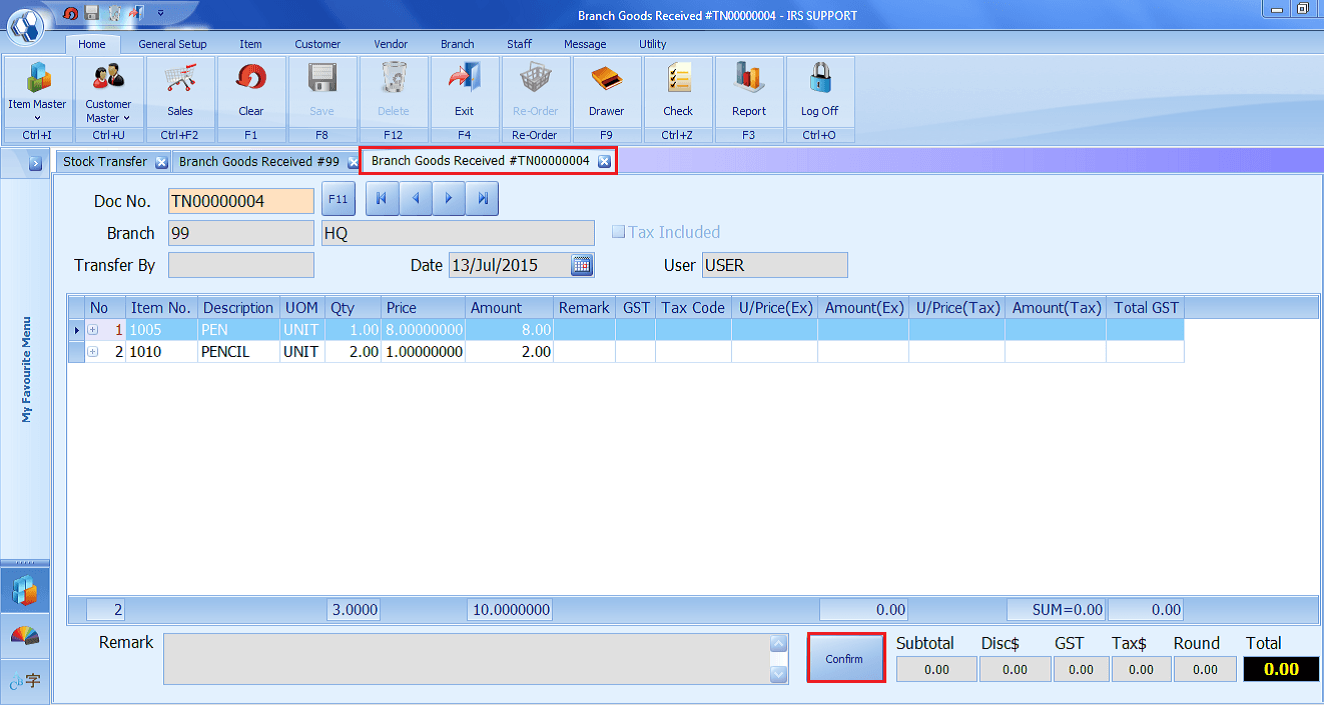
- 5. Click on the “View Document” to view the transfer detail.
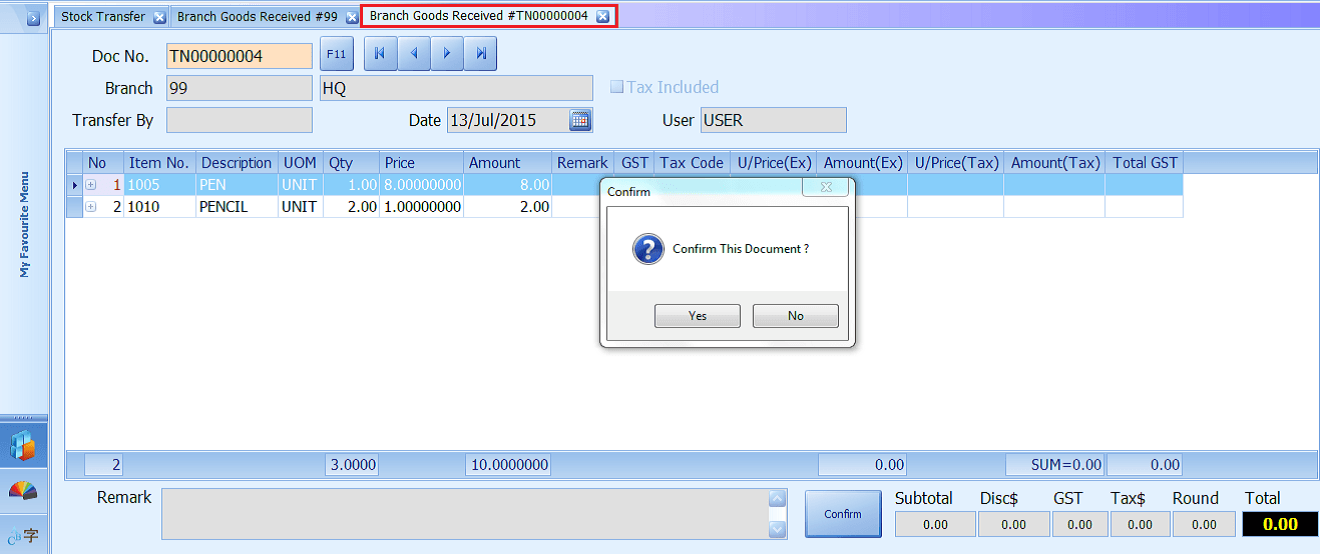
- 6. The Stock Transfer Note opens a new screen with the “Confirm” command button.
- 7. Click on the confirm to confirm the document.
- 8. The confirmation screen prompt.
- 9. Click “Yes” to confirm.
- 10. Information screen prompt “Document Confirmed. Do you want to View Goods Received Note?
- 11. Click “Yes” to view Goods Received Note.
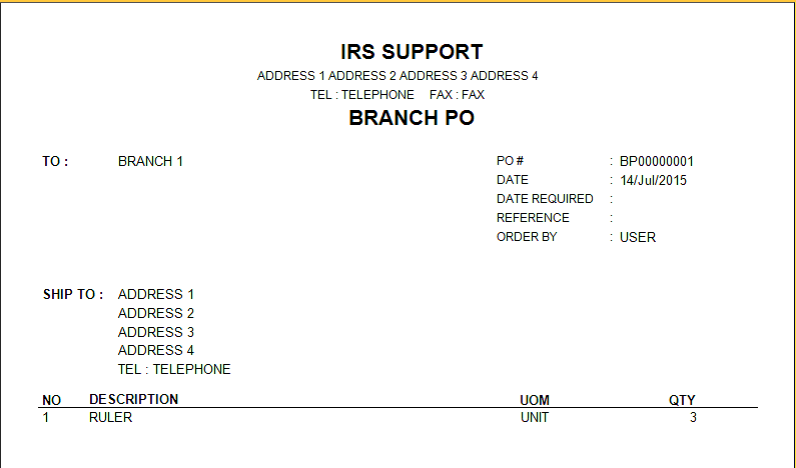
Branch – Purchase Order
- Purchase Order is issued when Branch places an order with the vendors:-
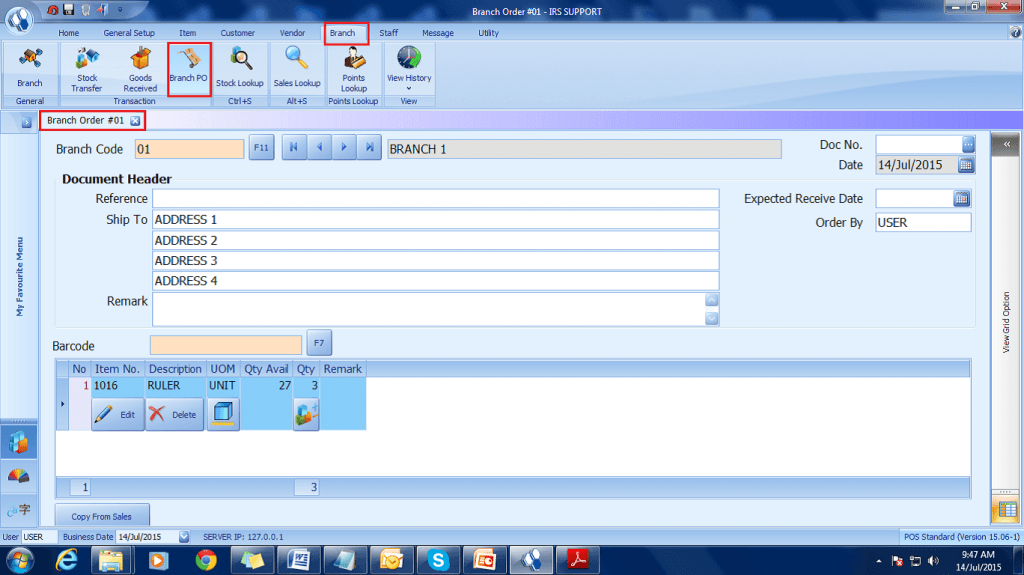
- 1. Go to Branch > Branch PO
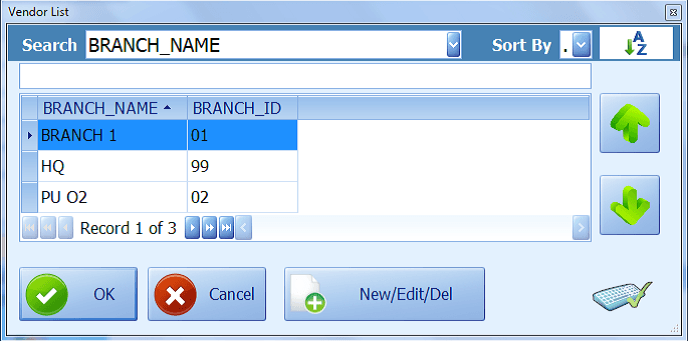
- 2. Enter the Branch Code or Press F11 to select a branch from the list.
- 3. Below is the Branch List.
- 4. Enter the Barcode number or press F7 view the item list.
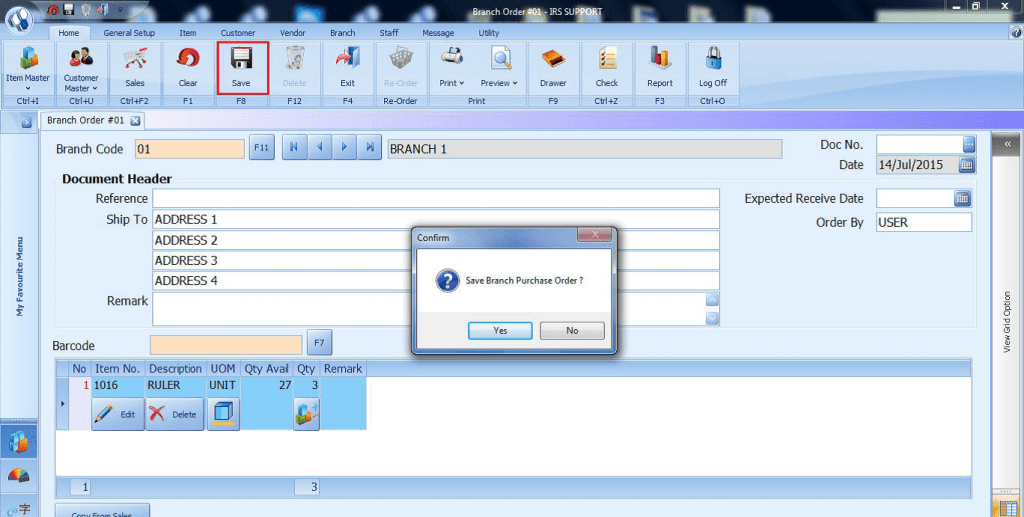
- 5. Click Save or press F8 to save the Purchase Order.
- 6. Click Yes on the Confirm screen to confirm with Purchase Order.
- 7. Branch Purchase Order document generated
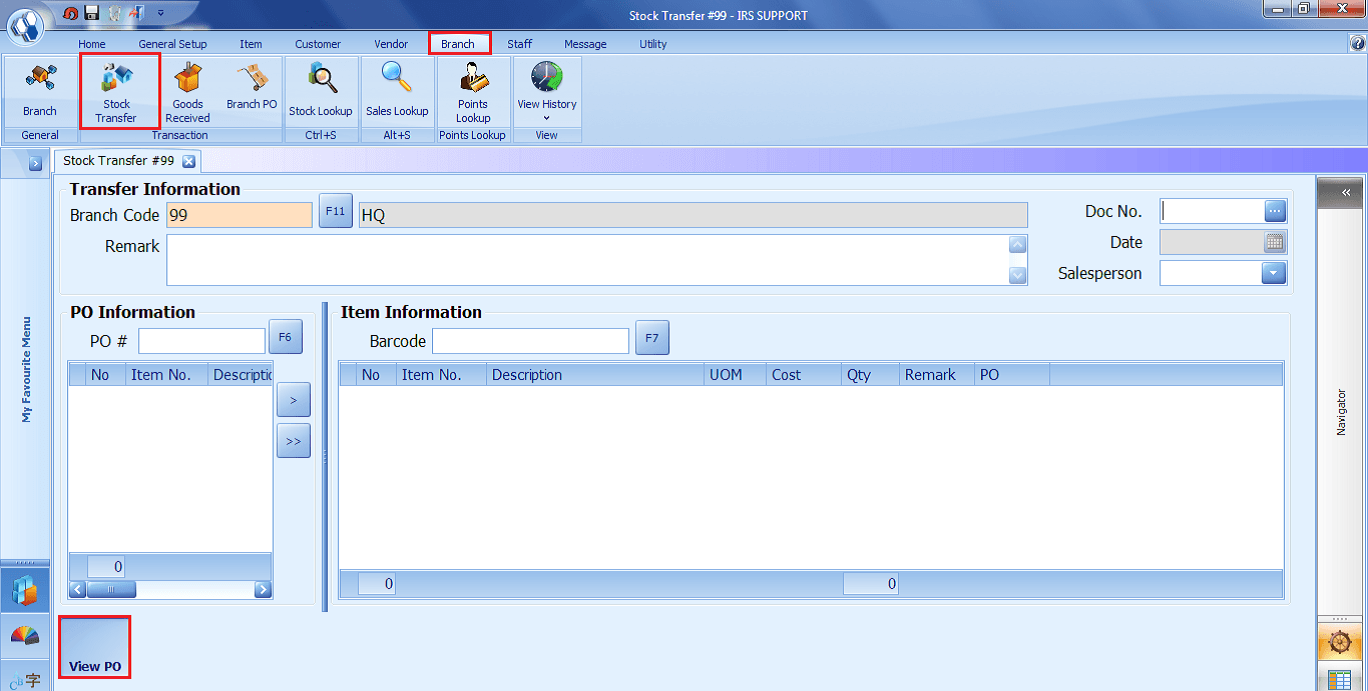
Brach – Purchase Order (Receiver)
- – To View Branch Purchase Order at the branch receiving side:-
- 1. Enter the Branch Code.
- 2. Click “View PO”
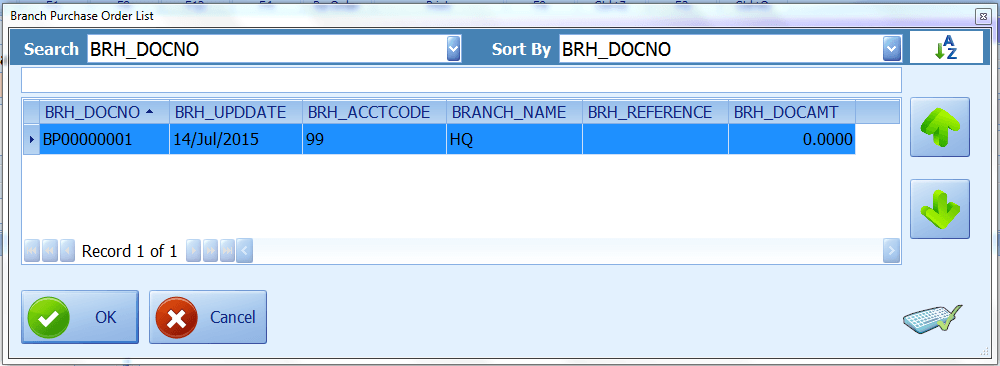
- 3. Click View “PO”
- 4. Click PO# drop-down list.
- 5. Screen showing Branch Purchase Order List for the user to select the PO.
- 6. Click “>” to add the item to the transfer list under the Item Information Section OR Click “>>” to add all item to the transfer list under the Item Information section.
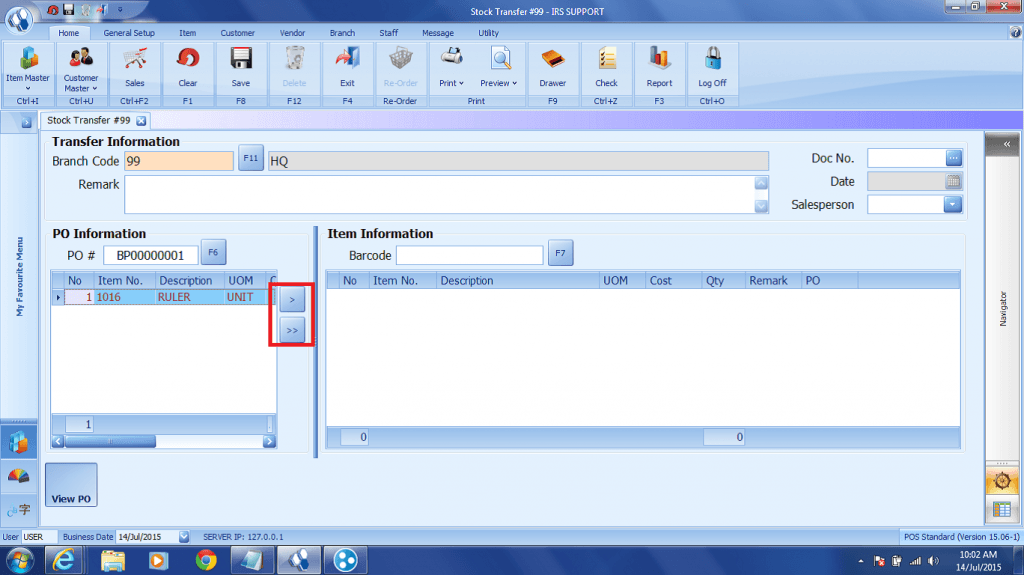
- 7. Click Save to save the Stock Transfer.
- 8. Click Yes to confirm the Stock Transfer.
- 9. Stock Transfer Note document generated.
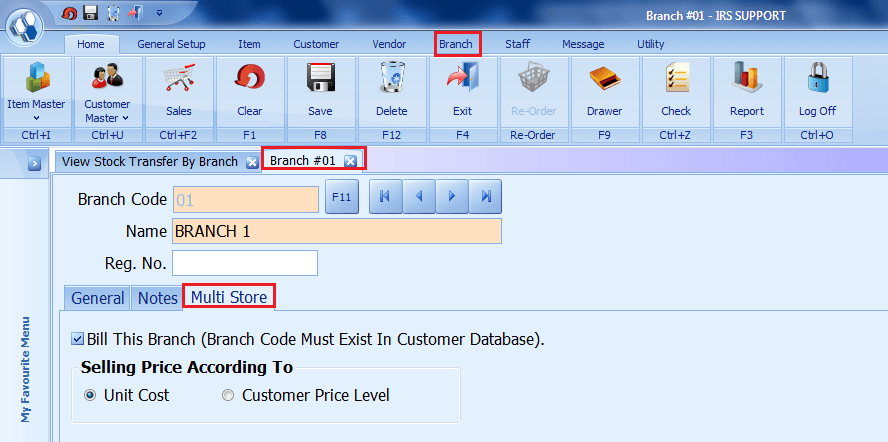
Brach – Branch – Multi-Store (Bill to Branch)
- – Issue Invoice to the other Branch / HQ.
- 1. Go to Branch > Branch > Multi-Store
- 2. Tick “Bill This Branch (Branch Code Must Exist in Customer Database)” checkbox.
- 3. Choose the Selling Price According to option.
- – Unit Cost
- – Customer Price Level
- 4. Create Customer Account for this branch.
- 5. The Customer Account Code should be the same as the Branch Code.
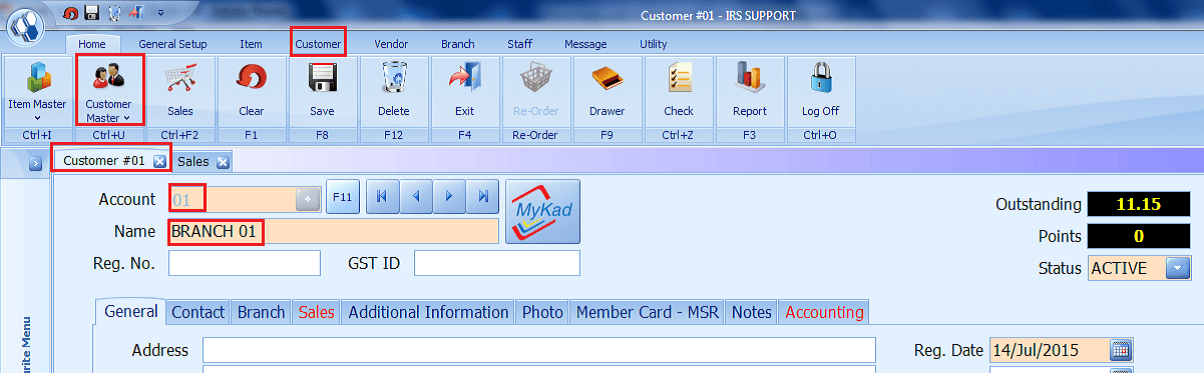
- 6. Issue an invoice to the Branch. (Customer Account)
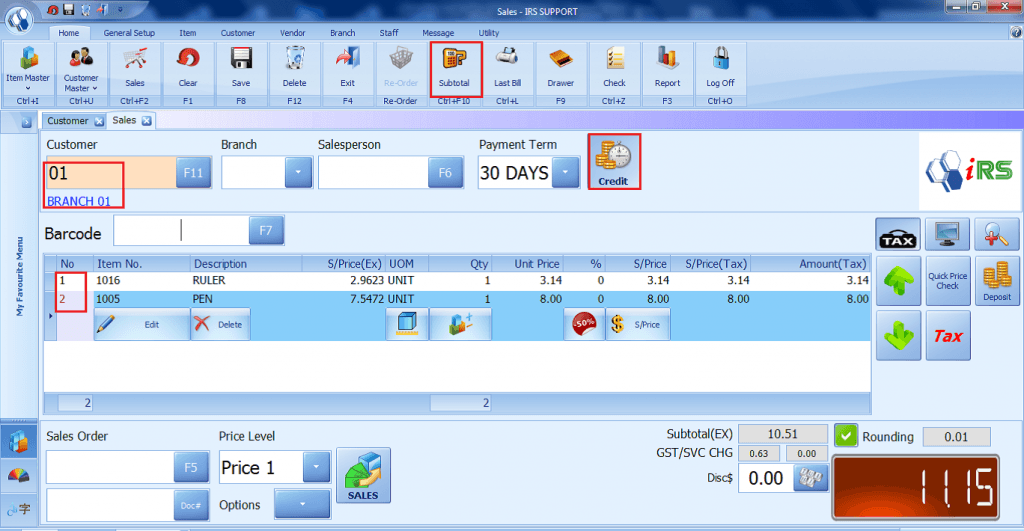
Note: The Bill to Branch should be in credit sales.
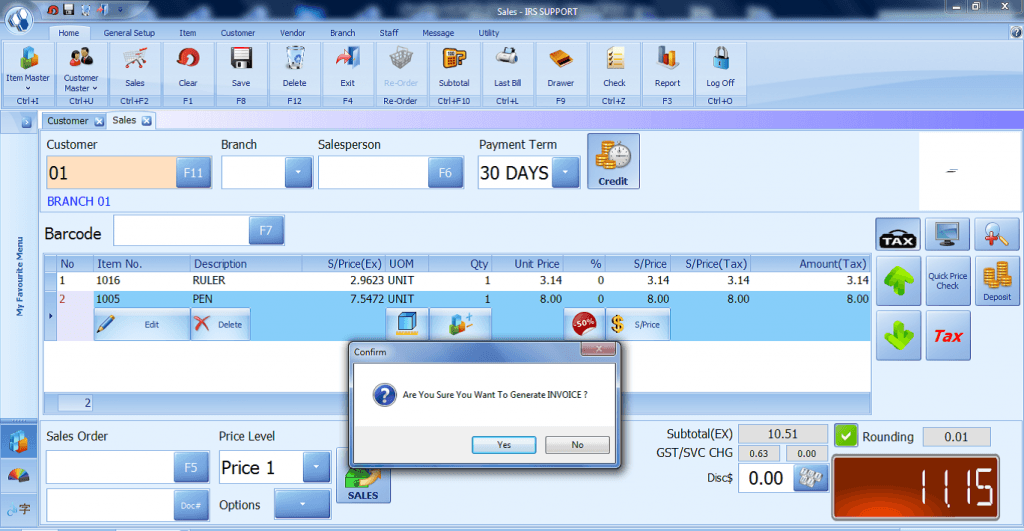
- 7. Click Yes to generate the invoice.
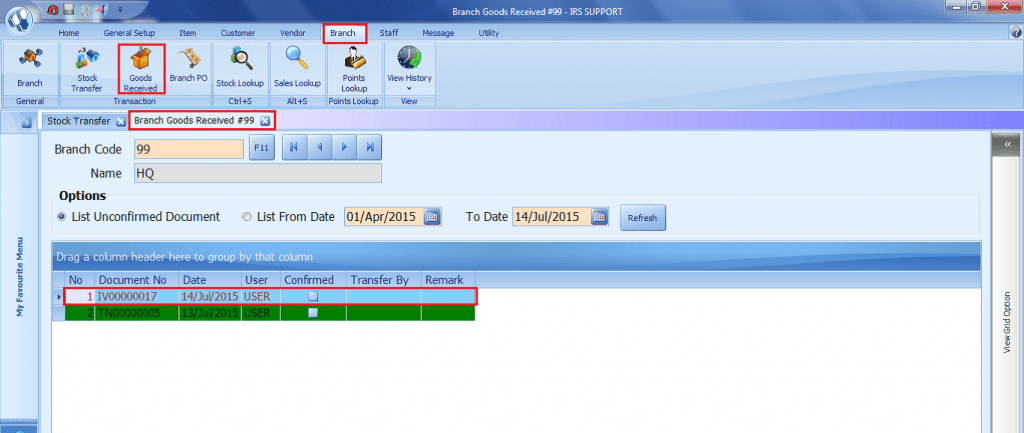
- 8. Branch Receiving Invoice. (at the other branch)
- 9. Go to Branch > Goods Receive
- 10. Select the Branch Code.
- 11. The Invoice is listed.
Customer – Sales (Bill to Branch – Branch Purchase Order)
- 1. Go to Customer > Sales
- 2. Enter Customer Account Code.
- 3. Click Options.
- 4. Select Branch Purchase Order.
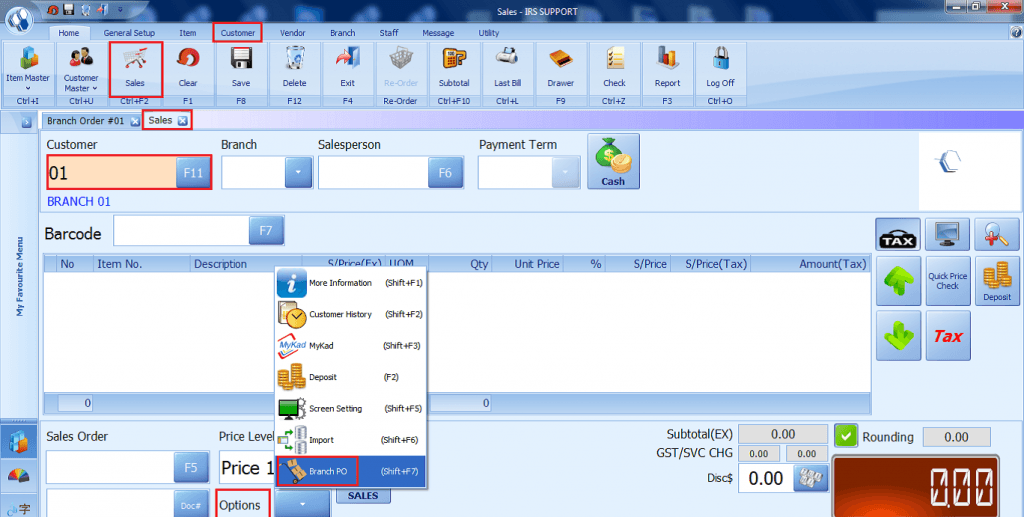
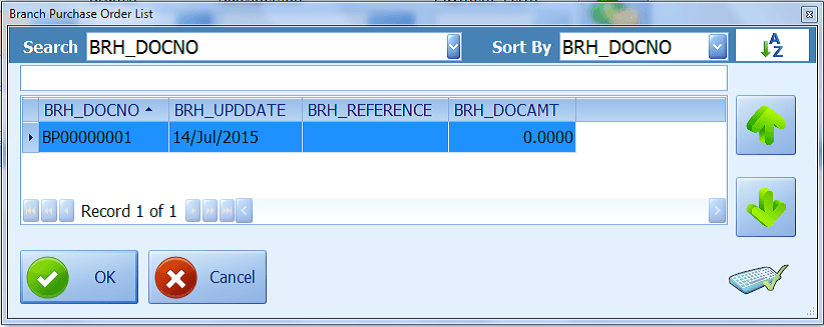
- 5. Branch Purchase Order List prompt.
- 6. Select Branch Purchase Order and click OK.
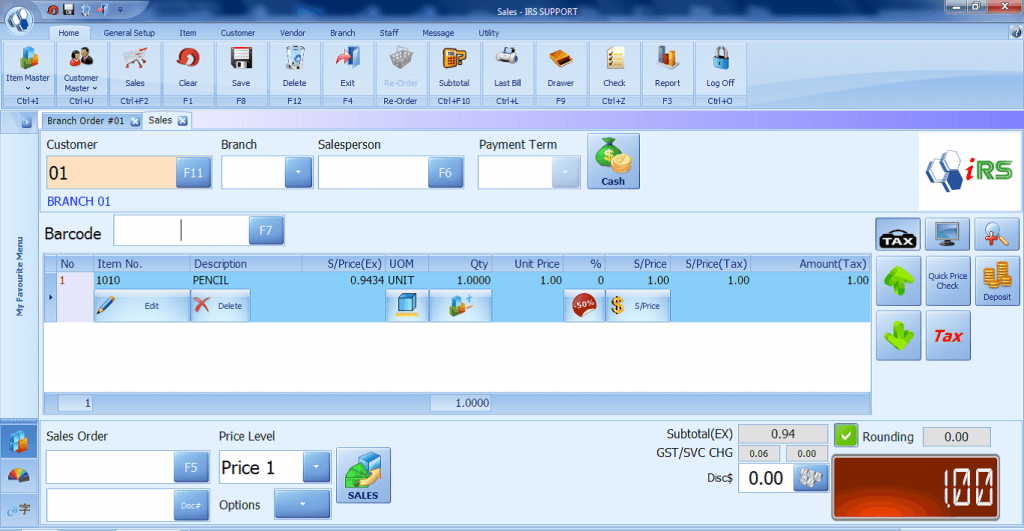
- 7. Branch Purchase Order information is listed in Sales Screen.
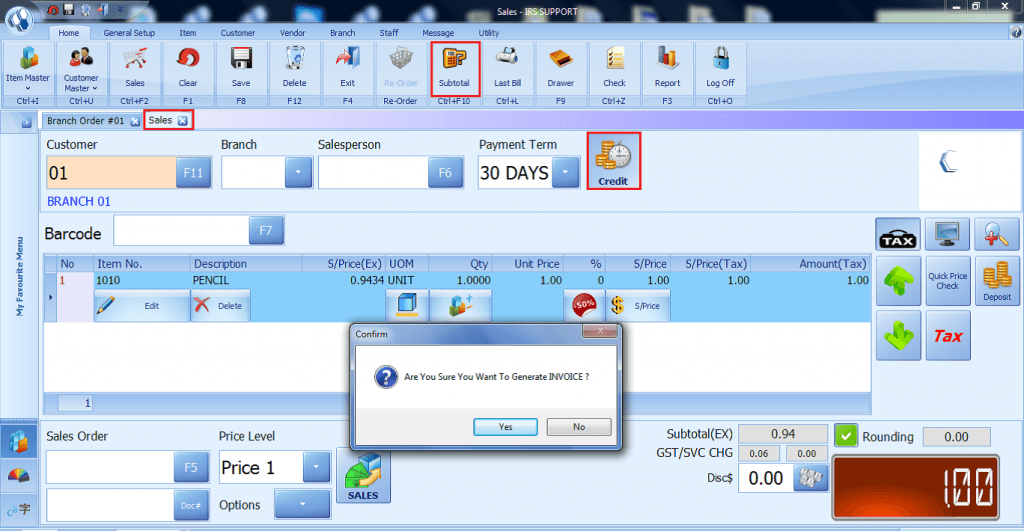
- 8. Ensure it is Credit Sales and Click on the Subtotal.
- 9. Click Yes to Confirm generate an invoice.
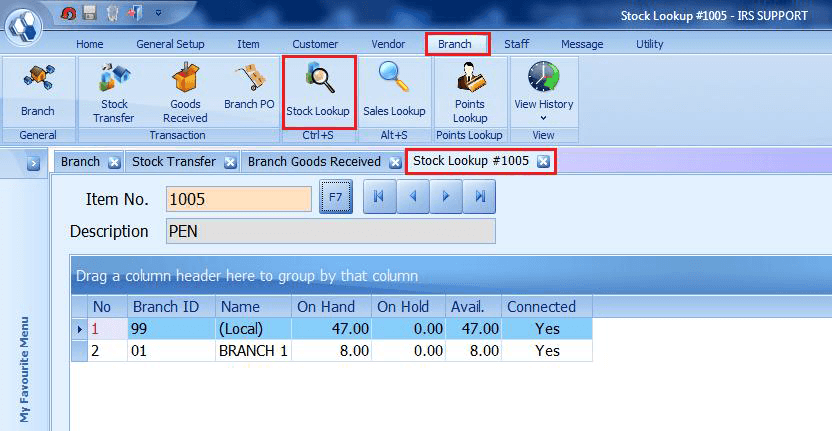
Branch – Stock Lookup (Branch Stock Lookup)
- 1. Go to Branch > Stock Lookup
- 2. Enter the item code.
- 3. Details will be shown as per on the screen.
Note: The items will not be listed in the branch is disconnected from the HQ.
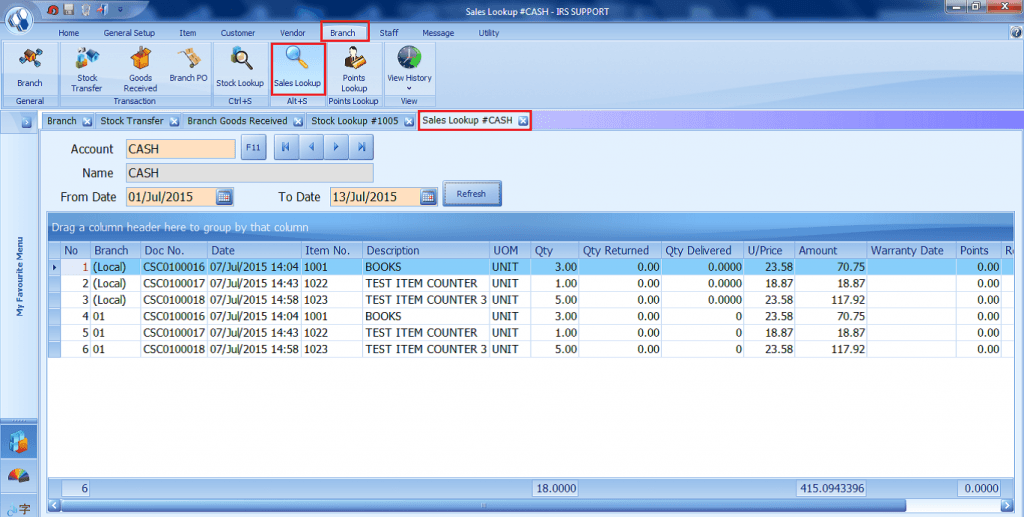
Branch – Sales Lookup (Branch Sales Lookup)
- – To view sales record for all branches based on the customer:-
- 1. Go to Branch > Sales Lookup
- 2. Select Customer / Account
- 3. Select the Date Range.
- 4. Click Refresh.
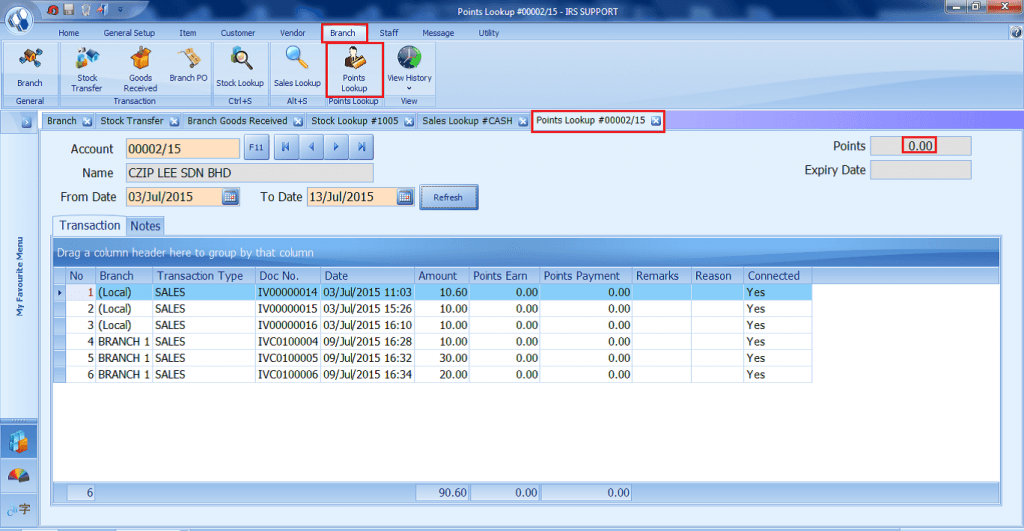
Branch – Points Lookup
- To check customer’s point entitled.
- To trace customer’s point transaction history.
- To check customer’s point from other outlets.
- 1. Go to Branch > Points Look up
- 2. Select Customer / Account
- 3. Choose the Date Range.
- 4. Click Refresh.
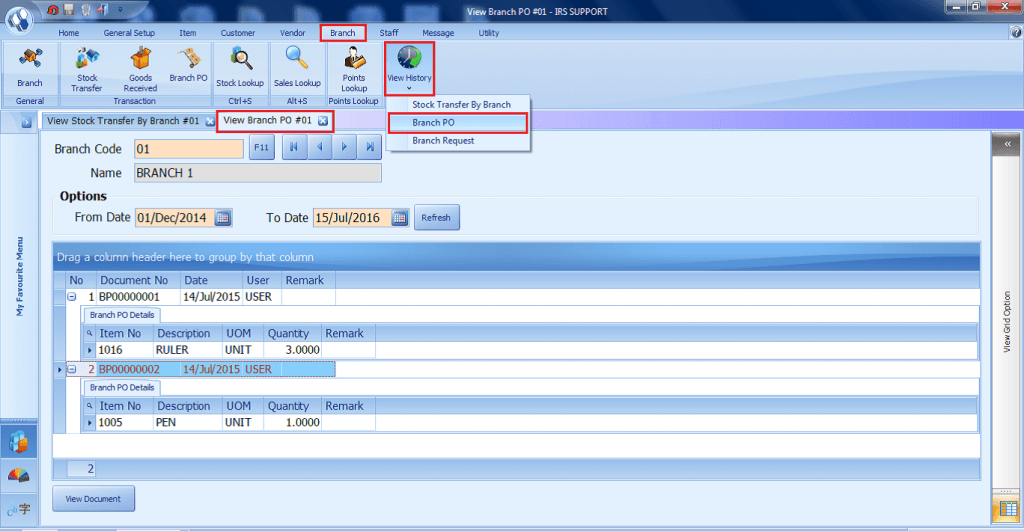
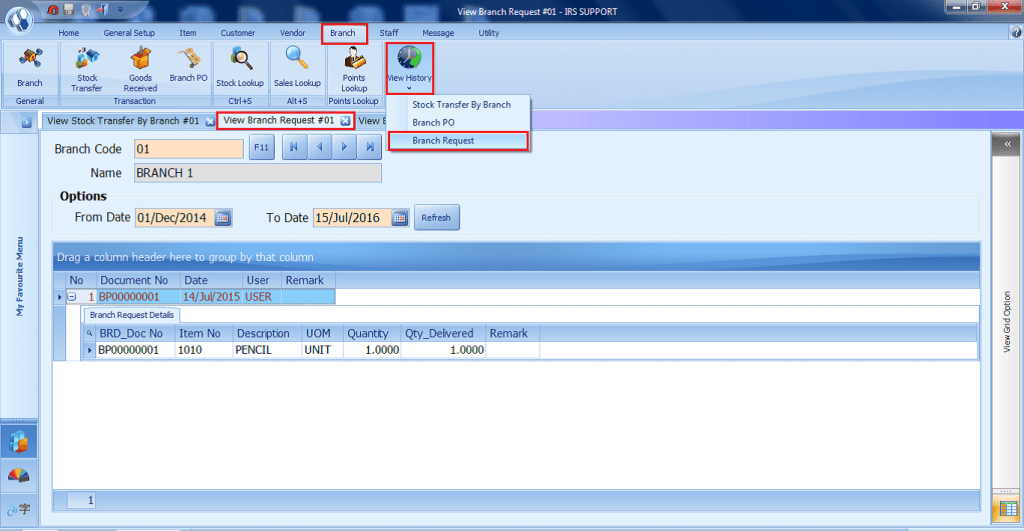
Branch – View History
View Stock Transfer By Branch
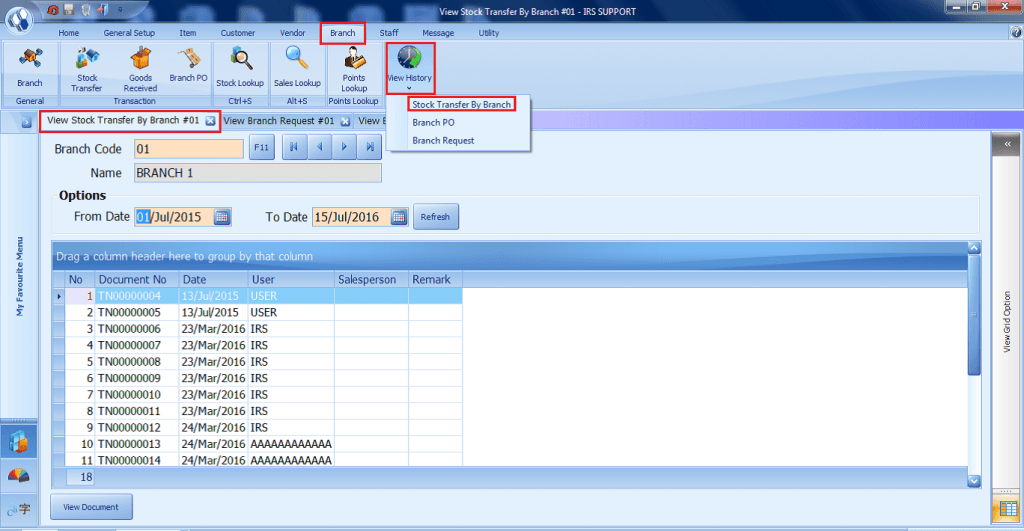
View Branch Purchase Order
View Branch Request
Share Link: https://www.irs-software.com/faqwd/irs-multi-store-system/
Was this answer helpful ?
Yes
/
No
BACK TO BLOG PAGE